

Learn how to fill a clipper lighter properly with our comprehensive guide. Save time, money, and reduce waste with these easy-to-follow steps.
Are you tired of constantly buying new lighters because you can’t seem to refill them properly? Look no further than the trusty clipper lighter. But with great power comes great responsibility, and learning how to fill a clipper lighter is no exception.
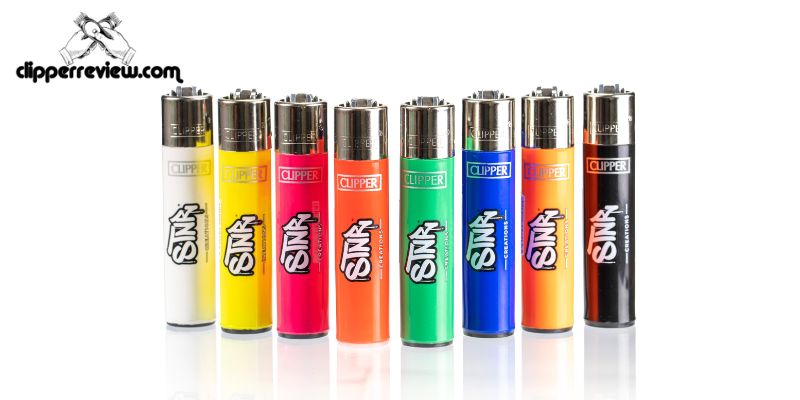
First things first, let’s define what a clipper lighter is. Unlike disposable lighters, a clipper lighter is refillable and has a removable flint for easy replacement. They also have a unique shape that makes them easier to hold and use compared to traditional lighters.
Knowing how to properly fill a clipper lighter is essential in order to save yourself time and money in the long run. Not only will it help you avoid constantly buying new lighters, but it also reduces waste and helps the environment.
In this comprehensive guide, Clipperreview will take you step-by-step through the process of filling your clipper lighter, choosing the right fuel, and using it safely and effectively. So grab your clipper lighter and let’s get started.
Understanding Your Clipper Lighter

Before we dive into the process of filling your clipper lighter, it’s important to understand its components and how to take proper care of it.
Parts of a Clipper Lighter
A clipper lighter consists of several parts that work together to produce a flame. The main parts of a clipper lighter include the body, the flint wheel, the flint, the gas chamber, and the flame adjuster. The body is the outer shell of the lighter that houses all the other parts. The flint wheel is located on the bottom of the lighter and is used to ignite the flame. The flint is a small, replaceable piece that creates a spark when struck against the flint wheel. The gas chamber is where the fuel is stored, and the flame adjuster is used to adjust the size of the flame.
Different Types of Clipper Lighters
Clipper lighters come in a variety of styles, colors, and designs. Some clipper lighters feature unique designs, while others are more basic and classic. Additionally, there are different types of clipper lighters, including regular clipper lighters, mini clipper lighters, and electronic clipper lighters.
Maintenance and Care
To ensure that your clipper lighter lasts as long as possible, it’s important to take proper care of it. This includes keeping it clean and dry, avoiding dropping it or exposing it to extreme temperatures, and replacing the flint and fuel when necessary. It’s also important to store your clipper lighter in a safe place and to avoid leaving it in direct sunlight or near other sources of heat.
By understanding the different parts of your clipper lighter and how to properly care for it, you can ensure that it lasts for years to come.
Choosing the Right Fuel
When it comes to choosing the right fuel for your clipper lighter, it can be overwhelming with so many options available. But fear not, we’ve got you covered with this breakdown of the types of fuels for clipper lighters.
Types of Fuels for Clipper Lighters
- Butane Gas: Butane gas is a popular choice for clipper lighters as it is affordable and easy to find. It is also a clean-burning fuel that produces a consistent flame. However, it does not perform well in cold temperatures and may not be suitable for outdoor activities in colder climates.
- Propane Gas: Propane gas is another option for clipper lighters. It is more expensive than butane gas but performs better in colder temperatures. It also produces a hotter flame, which may be useful for lighting cigars or larger pipes.
- Isobutane Gas: Isobutane gas is a blend of butane and propane gases and is commonly used in camping stoves and backpacking gear. It is a versatile fuel that performs well in varying temperatures and elevations. However, it may not be as readily available as butane or propane gas.
Pros and Cons of Each Fuel Type
- Butane gas:
Pros: affordable, clean-burning, consistent flame
Cons: not suitable for cold temperatures - Propane gas:
Pros: performs well in colder temperatures, hotter flame
Cons: more expensive - Isobutane gas:
Pros: versatile, performs well in varying temperatures and elevations
Cons: may not be as readily available
Recommended Fuel for Clipper Lighters
While any of the above options can work, we recommend using butane gas for clipper lighters. It is widely available, affordable, and produces a consistent flame. Just make sure to store it at room temperature and avoid exposing it to extreme temperatures.
Filling Your Clipper Lighter

Step-by-Step Guide on How to Fill a Clipper Lighter
Filling your clipper lighter is a simple process that can be done in just a few steps. Here’s how to do it:
- Remove the flint screw from the bottom of the lighter.
- Hold the lighter upside down and use a screwdriver or other tool to push the old flint out of the lighter.
- Fill the lighter with fuel by holding it at a 45 degree angle and inserting the nozzle of the fuel canister into the valve at the bottom of the lighter.
- Press down on the canister to release the fuel into the lighter. Be careful not to overfill the lighter.
- Once the lighter is full, replace the flint screw and tighten it until it is secure.
Important Things to Remember When Filling a Clipper Lighter
While filling a clipper lighter may seem straightforward, it’s important to keep a few things in mind.
First and foremost, always use high-quality fuel that is specifically designed for use in lighters. Using the wrong type of fuel can damage your lighter and cause it to malfunction.
It’s also important to avoid overfilling your lighter. This can lead to leaks and may cause the lighter to produce a weak flame or stop working altogether.
Finally, make sure to keep your lighter away from heat sources and open flames while filling it. This will help prevent accidents and ensure your safety.
Common Mistakes to Avoid When Filling a Clipper Lighter
When filling your clipper lighter, there are a few common mistakes to watch out for. These include:
- Overfilling the lighter, which can cause leaks and lead to malfunctions.
- Using the wrong type of fuel, which can damage your lighter and cause it to stop working.
- Filling the lighter near an open flame or heat source, which can be dangerous.
- Failing to replace the flint screw securely, which can cause the lighter to malfunction.
Using Your Clipper Lighter
Using your clipper lighter may seem like a no-brainer, but there are some tips and tricks that can help you get the most out of it.
Tips on How to Properly Use a Clipper Lighter
To get the best use out of your clipper lighter, make sure to hold it at a slight angle and point it away from your face. This will help prevent accidental burns or injuries. Additionally, make sure the flame is not too high or too low while in use. A medium flame is usually the best option for most situations.
How to Adjust the Flame
If you find that the flame on your clipper lighter is too high or too low, don’t fret. Adjusting the flame is simple. First, remove the metal cover by pulling it up and off. Then, use a small screwdriver or other tool to adjust the flame height by turning the screw located at the base of the flame.
Safety Precautions When Using a Clipper Lighter
While clipper lighters are generally safe to use, it’s important to take some safety precautions. Always make sure to use your clipper lighter in a well-ventilated area and avoid using it near flammable materials. Additionally, keep it out of reach of children and pets and never leave it unattended while in use.
By following these tips and taking the necessary precautions, you can safely and effectively use your clipper lighter for all your lighting needs.
In Conclusion
In conclusion, knowing how to fill a clipper lighter is an essential skill for any smoker or outdoor enthusiast. Not only does it save you money and reduce waste, but it also helps you get the most out of your clipper lighter.
In this guide, we’ve covered everything you need to know about filling your clipper lighter, including understanding its parts and maintenance, choosing the right fuel, and using it safely and effectively. By following these steps, you can ensure that your clipper lighter remains in good condition and provides you with a reliable flame every time you use it.
Remember, the key to filling a clipper lighter is to take your time and follow the instructions carefully. With a little practice, you’ll be a pro in no time.
And finally, if you’re in the market for a new clipper lighter, be sure to check out our website, clipperreview.com, for the latest reviews and recommendations. Happy smoking!